
TUTORIALS

Organizations
Manage and invite Team Members in organization
To add team members to your shared organization, follow these steps:
- Select the ‘Organization settings’ option from the main menu on the left
- Navigate to the ‘Team’ tab
- Enter the email address of the team member and select ‘Send Invite’

This page also provides users with a dashboard view of new and existing team members within your organization. From this page, you can configure usage control, manage access to custom and batch servers, hand over admin controls, or also remove users from the organization.


Workspace
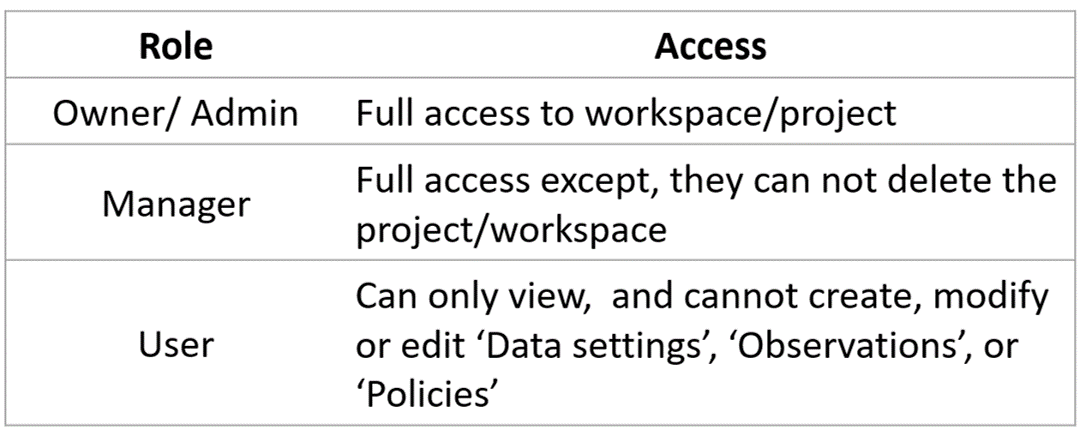
You can also invite/ add users in the workspace through the ‘Members’ tab. Once added to a workspace, the user will have access to all projects within the workspace. You can however, control the level of access they can have by defining their role for the workspace. The role can either be of an Owner, User or Manager.
Each role has specific use access criteria as defined below. You can also modify the user role or revoke access through the workspace settings.
Project
If you want a user to have access to a particular project and not the entire workspace, you can select the ‘Add user’ option under ‘Actions’. However, the user must be a part of the organization.
You can define the roles of new users as an Owner/ Admin, User or Manager. You can also modify the user role or revoke access through the workspace settings.
Follow Us


